Minitab Statistical Software displays the information that you need in the analyses that you perform, but it’s possible that you might want to capture information in a different place, or even a different program, so that the results are as easy to communicate as possible. For those occasions, it’s helpful to know how to get text even from the less obvious places in Minitab. Here are five useful cases:
1. Boxplot Tooltips
In Minitab, you often can hover over part of a graph and get a yellow box with some text in it. Try this:
- Choose File > Open Worksheet.
- Click Look in Minitab Sample Data Folder.
- Select Exh_aov.MTW and click Open.
- Choose Graph > Boxplot.
- Select One Y With Groups. Click OK.
- In Graph Variables, enter Thickness.
- In Categorical variables for grouping, enter Setting. Click OK.
Now you have a boxplot that shows how different the thicknesses are for different settings. Leave your mouse pointer over one of the boxplots, and Minitab displays some of the sample statistics. To record those exact statistics for each boxplot, you need an additional step.
- Click a boxplot twice slowly so that only one boxplot is selected.
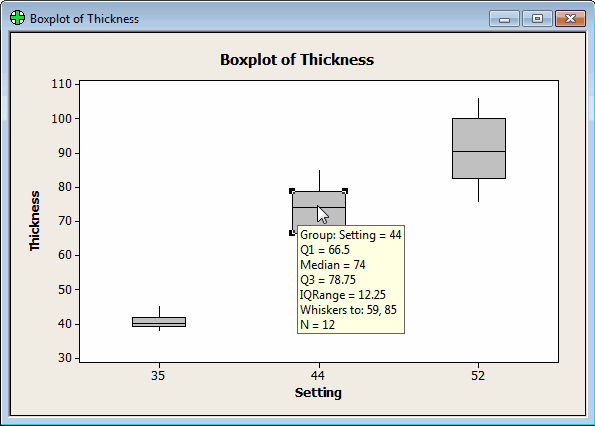
- Right-click on the boxplot and choose Copy Text.
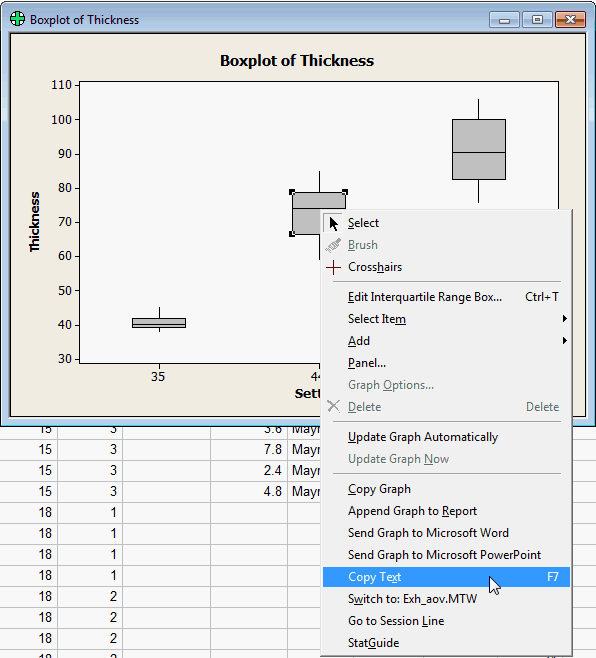
- Press CTRL+V to paste the tooltip text into the boxplot
- Repeat steps 1 to 3 for each boxplot.
- Double-click the text to edit the words and font size.
- Click and drag the text boxes into a pleasant arrangement.
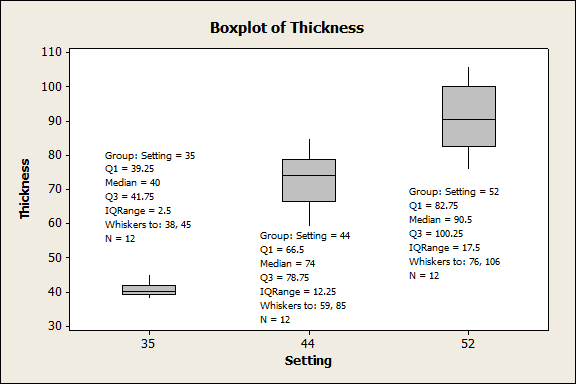
Superuser tip
Right-click your boxplot and choose Send Graph to Microsoft Word. The boxplots and the copied statistics go right into your report.
2. Scatterplot Tooltips
The boxplot tooltips are great for getting the exact statistics the plots show. In scatterplot, you can use the same copying feature to display the equation of the regression line. Follow this example using the same data set that we used for the boxplot tooltips.
- Choose Graph > Scatterplot.
- Select With Regression and click OK.
- In Y Variables enter Thickness.
- In X Variables, enter Setting. Click OK.
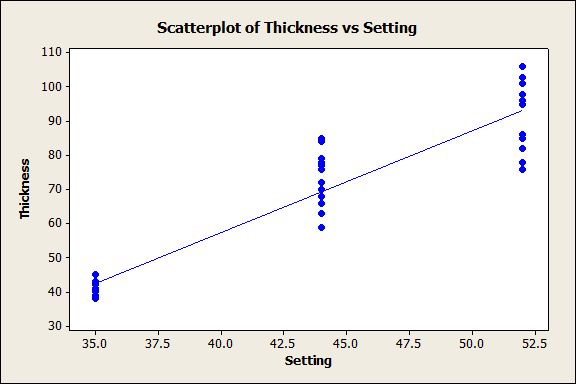
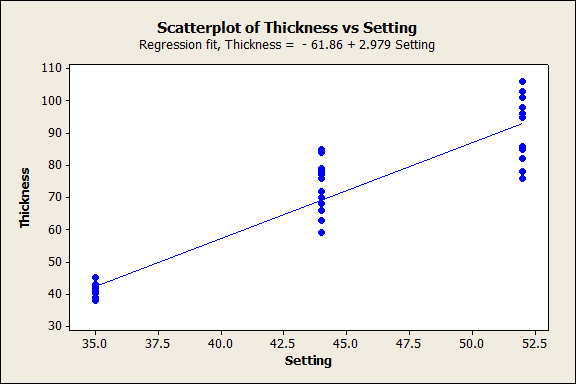
Now you have a nice scatterplot that shows a line. In real life, we’d dig deeper into this relationship before using the line because we can see that the variation increases with Setting. But we can still use this graph to illustrate how to get the equation for the line onto the graph.
- Click the regression line to select it.
- Right-click and choose Copy Text.
- Right-click and choose Add > Subtitle.
- Paste the copied text from the tooltip into Subtitle. Click OK.
Now, the equation is in your subtitle.
Superuser tip
The line and the equation are nice, but for the most detail, use Minitab’s Assistant Menu. That’s also another place where you might not know how easy it is to copy!
3. Minitab’s Assistant Menu Summary Report
Minitab’s Assistant Menu is a great tool that leads you through your analysis. One of the best parts of the Assistant Menu is that it provides a summary report to help you interpret your results with confidence. You can try it out for yourself on the same data set we used for the boxplots and scatterplot.
- Choose Assistant > Regression.
- Click Click to perform analysis.
- In Y column, enter Thickness.
- In X column, enter Setting. Click OK.
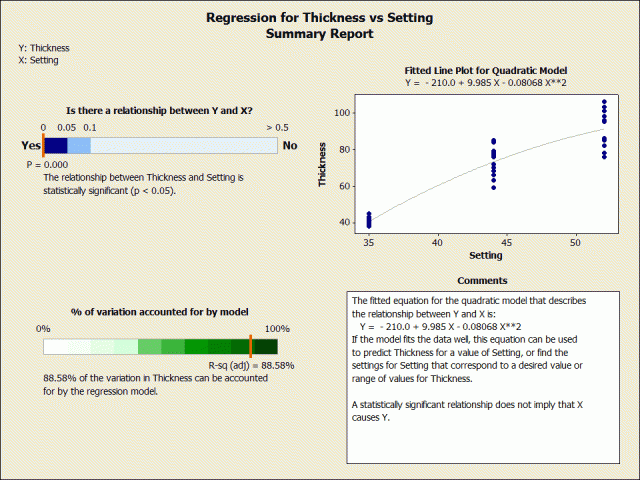
The Comments section includes the fitted equation, a reminder to inspect the fit before using the model to predict, and a caution that statistical significance does not mean that a change in X will cause a change in Y. If you want to emphasize just these comments, it’s as easy as getting the tooltip text.
- Right-click the Comments box.
- Choose Copy Text.
- Paste the copied text into another program, such as Microsoft Word.
You’re all set to discuss this portion of the Summary Report in detail.
4. Minitab’s Assistant Menu Report Card
Minitab’s Assistant Menu also includes guidelines to ensure that your analysis is successful. The first report in most Assistant Menu analyses is the Report Card, a great summary of checks on your data.
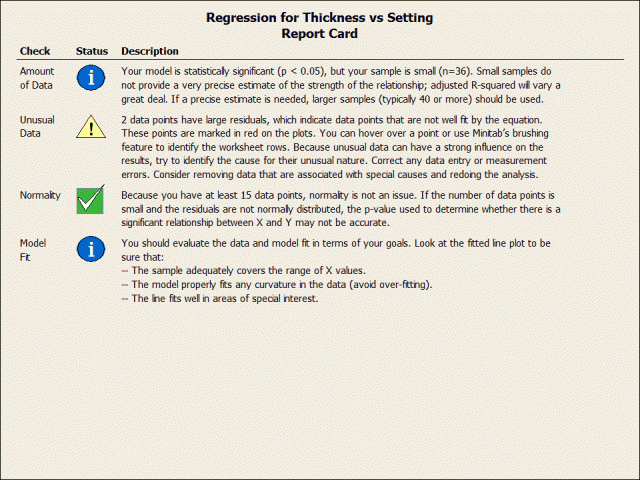
The Report Card for Regression includes four data checks. In a presentation, you might want to call attention to some of the checks more than others. In this case, you might want to spend extra time explaining just the Unusual Data check, because it has a caution symbol.
- Right-click the text.
- Choose Copy Text.
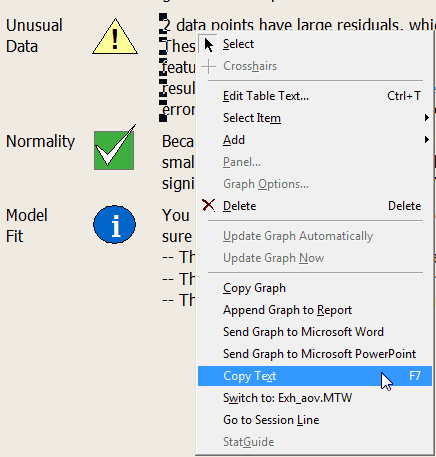
- Paste the text into another program, such as Microsoft Word.
You’re ready to give more detail about the two data points with large residuals.
Superuser tip
You can also edit the text in the Report Card. Double-click the text and you can add all the notes that you want.
5. Minitab Help
You know that you can copy text from tooltips in Minitab graphs and from the Minitab Assistant Menu Reports. If your goal is to show someone else how to do an analysis in Minitab, an example can be a big help.
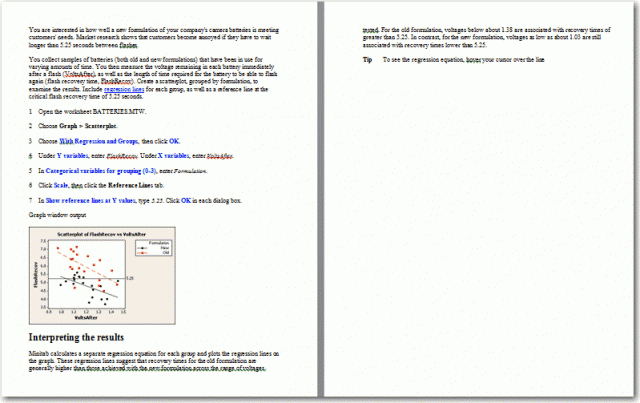
Suppose that you want to include the example of a scatterplot with separate lines for different groups in a Microsoft Word 2010 document.
- Choose Graph > Scatterplot.
- Select With Regression and Groups. Click OK.
- Click the Help button in the lower left corner of the Scatterplot dialog box.
- In the table of contents, select Example, with regression and groups.
- Highlight the body of the example.
- Right-click and choose Copy.
- Paste the copied text into Microsoft Word. What you paste does not include the graph window output.
- Return to the example, right-click the graph and choose Copy.
- Place your cursor in Microsoft Word where the graph should appear.
- On the Home tab, in the Clipboard group, open the menu below Paste and choose Paste Special.
- In As, select Device Independent Bitmap. Click OK.
- In Microsoft Word, right-click the hyperlink in the second paragraph of the example and choose Remove Hyperlink.
Now you have the example, with formatted steps and graphical output, ready to share.
Summary
Minitab’s output includes a lot of detail. In a presentation or report, you might want to call attention to specific statistics or features. Knowing how to copy from all types of Minitab output and guidance can save a lot of time and effort. So grab those tooltips, Assistant Menu notes, and help examples, and use them to your heart’s content!


