I remember sitting in my ninth-grade chemistry class when my teacher mentioned that the day’s lesson would include a discussion about accuracy and precision, and how both relate to making experimental measurements. I’ve always been more of a liberal-arts-minded individual, and I initially thought, Is there really a difference between the two terms? In fact, I even remembered using the words interchangeably in my writing for English class!
However, as I continued through more advanced science and math courses in college, and eventually joined Minitab Inc., I became tuned in to the important differences between accuracy and precision—and especially how they relate to quality improvement projects!
Assessing Variation in Your Measurement Systems
I’ve learned that if you’re starting a quality improvement project that involves collecting data to control quality or to monitor changes in your company’s processes, it’s essential that your systems for collecting measurements aren’t faulty.
After all, if you can’t trust your measurement system, then you can’t trust the data that it produces.
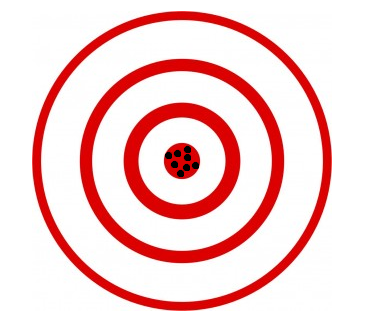
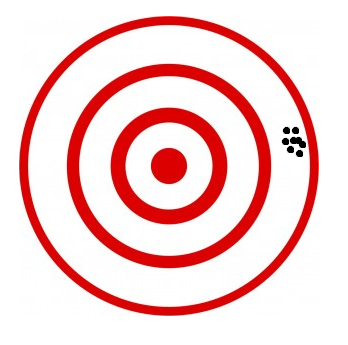
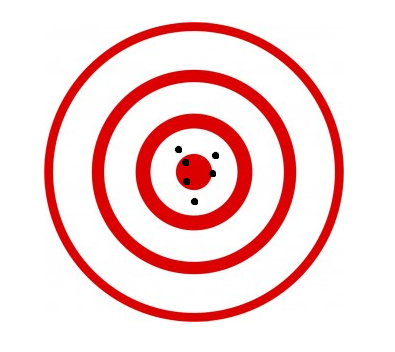
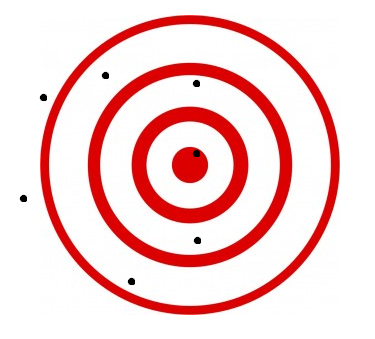
So what types of measurement system errors may be taking place? Here’s where accuracy and precision come into play. Accuracy refers to how close measurements are to the "true" value, while precision refers to how close measurements are to each other. In other words, accuracy describes the difference between the measurement and the part’s actual value, while precision describes the variation you see when you measure the same part repeatedly with the same device.
Precision can be broken down further into two components:
Repeatability: The variation observed when the same operator measures the same part repeatedly with the same device.
Reproducibility: The variation observed when different operators measure the same part using the same device.
It’s important to note that measurement systems can suffer from both accuracy and precision problems! A dart board can help us visualize the difference between the two concepts:


Accurate and Precise Precise...but not Accurate


Accurate, but not Precise Neither Accurate nor Precise
When Accuracy and Precision Get “Snacky”
Maybe this example can help to further show the differences. Let’s talk potato chips! Suppose you’re a snack foods manufacturer producing 12 oz. bags of potato chips. You test the weight of the bags using a scale that measures the bags precisely (in other words, there is little variation in the measurements), but not accurately – measuring 13.2 oz., 13.33 oz., and 13.13 oz. for three samples.
Or maybe the scale is accurate, measuring the three samples at 12.02 oz., 11.74 oz., and 12.43 oz., but not precise. In this case, the measurements have a larger variance, but the average of the measurements is very close to the target value of 12 oz.
Or maybe your measurements are all over the place, with samples measuring at 11.64 oz., 12.35 oz., and 13.04 oz., in which case your scale may be neither accurate nor precise.
But how can you detect these problems in your measurement system?
Evaluating Accuracy & Precision
Accuracy and precision can be easily evaluated through many measurement systems analysis tools in Minitab Statistical Software, including Gage Linearity and Bias Studies and Gage R&R Studies, which can help you reveal if a scale needs to be recalibrated or if your newly hired operators are measuring ingredients consistently.
What should you do if you detect accuracy and/or precision errors? Focus on improving your measurement system before relying on your data and moving forward with your improvement project. Allow the results of your Gage R&R Study to help you decide if recalibrating a scale or conducting more training for new hires might be just what you need to get your measurement systems back on track.
Check out these resources out to learn more about completing a Gage Study in Minitab:


