


 With Minitab Statistical Software, you have an easy-to-use interface and all the tools at your fingertips to quickly analyze data and make decisions on your most challenging business problems ... but where do you start if you have never used it before?
It can be daunting without a proper introduction.
And even for seasoned Minitab users who have been with us through a few versions of the software, they can still find quick and easy time-saving tips they didn't know before. That's why we are sharing these 5 tricks below.
Want more? These tricks are straight from the new free e-learning resource Minitab Quick Start™ Sign Up Now
1. Use Ctrl+E to navigate to the most recently used dialog box
From Calc to Stat to Graph, selecting a menu item to organize and structure your data and perform analyses is one of the most common steps in Minitab. Make one change to your data set and you will want to run the same test again.
Don't bother weaving your way through the menu. Every. Single. Time. Hit Ctrl+E and the most recently used dialog box will pop up, including any options and input you entered last time.
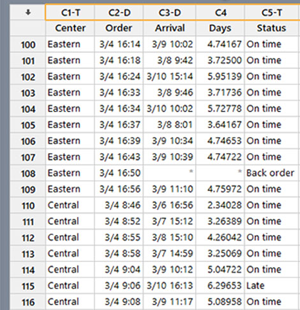
2. Date/Time, Numeric and Text: Know Your Data Type at a Glance
Did you know Minitab recognizes three different types of data? Minitab is able to read the first value you enter in a column and then automatically label the top of that column according to the data type so you can know your data type at a glance. The three data types are:
- Numeric shows just the column number, like C4. It uses numbers and can have a decimal separator and positive and negative signs.
- Date/Time has an indicator -D after the column number, like C2-D. It represents a number of different formats for date and/or time.
- Text has an indicator -T after the column number, like C1-T. Text data can contain any characters, letters, numbers and punctuation marks. It is also displayed as left justified, while the Date/Time and Numeric data are right justified.
3. Change your data type
After your data type is set, you cannot add a different type of data to that column. If you were to type in green, for instance, to a column where all of the other cells are numeric data like 5.993, 6.88, 4.33, etc., you'll get this:

We really don't know a scientific way to compare 5.993, 6.88, 4.33 and green (please let us know if you do!), so Minitab is doing this to help you out. If you do need to reformat your column after the format has been set though, you can click on a cell in the column, then right-click > Format Column and choose a new data type and display format.
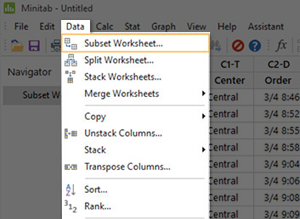
4. Don't just copy and paste. Subset your worksheet.
You can easily create a new worksheet with only the data you need at any time. Let's say, for example, you have information from every shipping center but you only want to take a look at one of them. Choose Data > Subset Worksheet and a dialog box will appear where you can select the criteria to make a new worksheet.
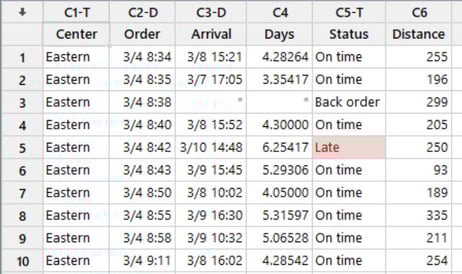
5. Conditional Formatting
Just like in Microsoft Excel, you can use conditional formatting in Minitab Statistical Software to highlight cells that meet a certain condition and identify unusual data points, typos or patterns in your data before you analyze it. In addition to standard options like Missing, Great Than and Equal To, Minitab has additional statistical rules available.
Hopefully you can use some of these tricks to help you every day! If you are interested in more free lessons on navigating Minitab Statistical Software’s interface, organizing and structuring your data, and importing data from other sources such as Excel, we encourage you to check out our new e-learning module Minitab Quick Start™!
Never tried Minitab Statistical Software? Try it now for free!

Want our experts to unlock the potential of your company's data? Learn more about our Training Services.