


For me, one of the best additions to Minitab Statistical Software has been Design of Experiments (DOE) to the Assistant. DOE in the Assistant has so many exciting aspects it’s hard to take it all in at once, but here are 5 highlights for when you plan and create a screening experiment:
1. Just-in-time guidance
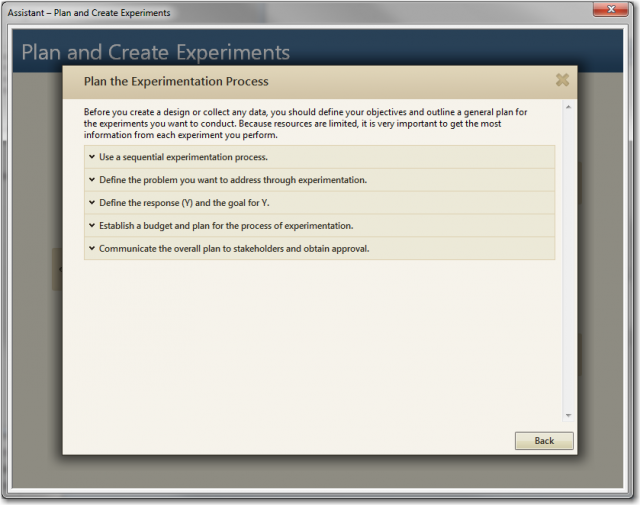
If you’re lucky, you’ve had the chance to study DOE with an expert. If not, even the flow chart that opens with the Assistant to plan an experiment might seem intimidating. Fortunately, you don’t have to go scouring the thrift store for used textbooks. Select Assistant > DOE > Plan and Create and click any of the tan shapes in the flow chart. The Assistant gives you the critical information you need to proceed.
Say, for example, that you aren’t sure what your first step should be. Click Plan the experimentation process and the Assistant reminds you that a good place to start is by making a list of potential factors. If you want help with that, you can use a fishbone diagram in Minitab Engage or choose Stat > Quality Tools > Cause and Effect.
2. Simplified decisions
Minitab Statistical Software is built for flexibility, so if you use the DOE tools accessible from the Stat menu, you have the option to choose from over 250 base screening designs. That flexibility is a powerful feature to have access to, but it's more than most people will need to do their jobs every day.
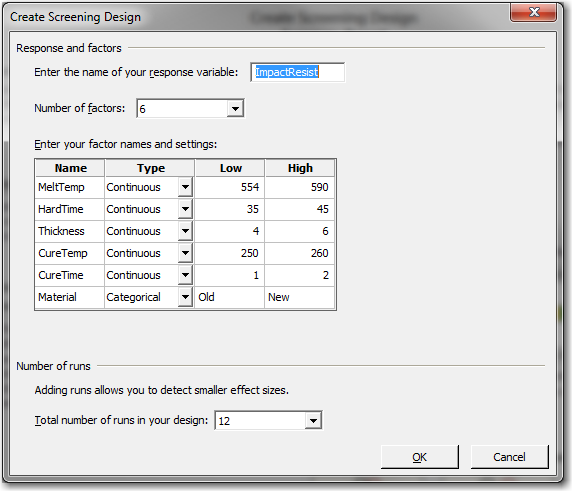
In the Assistant, the steps have been streamlined to make the work that you do every day faster. The Assistant offers 14 screening designs that will cover most of the typical situations you’ll encounter. On the flow chart, click Create Screening Design and you’re on your way.
3. Print the form
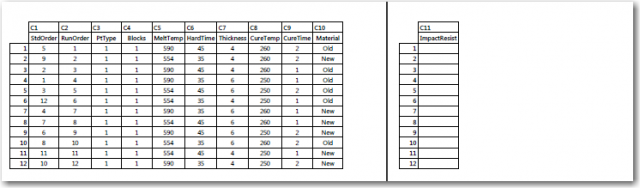
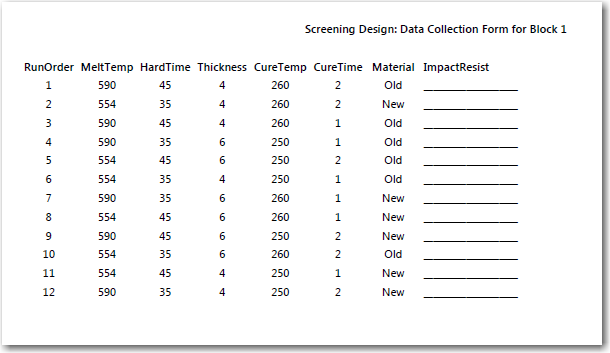
As soon as you click OK to create your design, the Assistant asks whether you want to print a data collection form. If you're entering your data directly into the worksheet, you may not need to print. But if you'll be collecting data manually (for instance, if your experiment happens in a place where you don't have access to your computer), the Assistant takes care of spacing, orienting, and titling the form so that you don’t have to. Take a look at the difference!
Print the worksheet from Minitab with no changes:
Let the Assistant do it for you:
4. Detection Ability
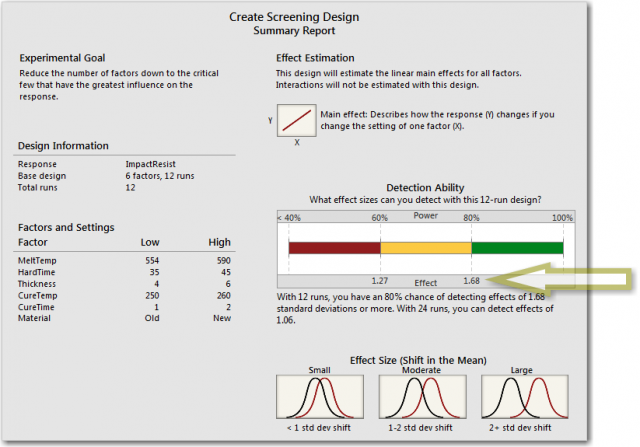
You wouldn’t know this unless you read the white paper, but one of the great things about the 14 screening designs in the Assistant is that they were chosen with their ability to detect effects in mind. That detection ability, which you might know as “statistical power” if you had the chance to study DOE with an expert, is an important feature that makes sure that your designed experiment isn’t a waste of time. The least powerful screening design the Assistant offers has an 80% chance of detecting an effect just a bit larger than 2 standard deviations (a moderate size effect). The rest all have a better than 80% chance of detecting an effect smaller than 2 standard deviations.
That detection ability means that when you choose a design the Assistant offers, you can be confident you’re planning an experiment that’s going to find important effects. The Summary Report that’s printed when you create the design even tells you the effect size you can detect 60% of the time and 80% of the time. For example, for 6 factors in 12 runs, you can detect an effect of 1.68 standard deviations 80% of the time.
5. Pre-Experiment Checklist
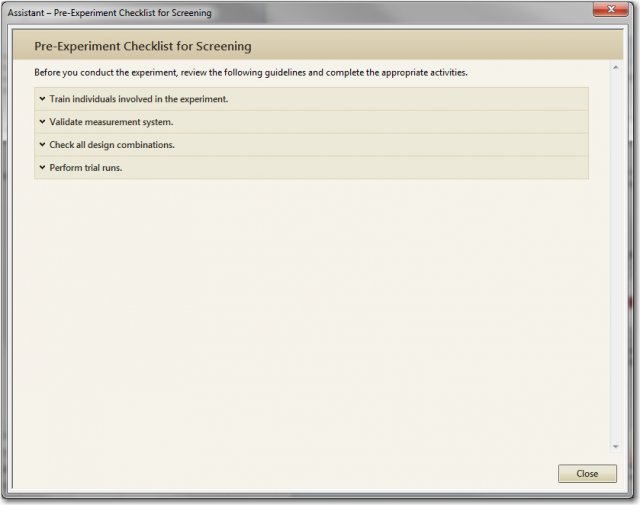
There’s more to successful DOE than knowing how to check your residuals. That’s what the pre-experiment checklist is for. The checklist reminds you about important steps that don’t necessarily have to be done in Minitab, like making sure people helping to run the experiment agree on how to set the factor levels and performing trial runs if you have the time and money. View the checklist by clicking the link at the bottom of the Report Card after you create the design.
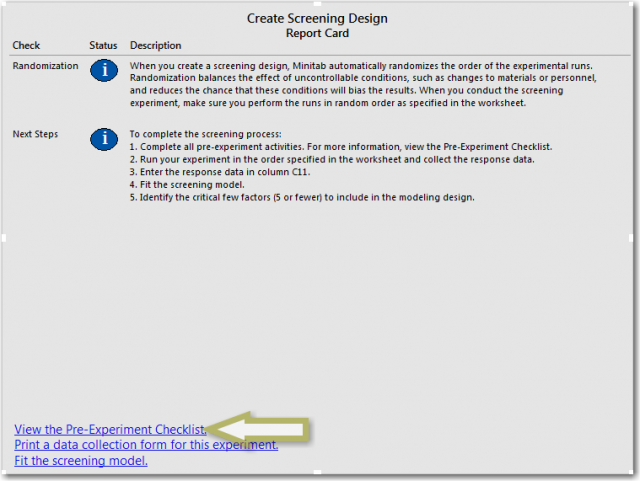
Whether you need in-depth guidance or a quick review, the pre-experiment checklist makes sure that you can collect your data confidently.
Get started
We know a lot of people are excited about the DOE features in the Assistant. If you’re eager to explore it, get the free trial.